How to Make a Water Filter
It’s no coincidence that many survival experts recommend building a water filter from common materials when clean water isn’t available. Making a water filter at home can provide a reliable way to purify water using layers like activated charcoal and sand to remove contaminants effectively.
Getting the assembly right is essential for safety and performance. The details on how to structure each layer can make all the difference in how well your filter works.
Understanding this process will help you guarantee your filter works as intended, ensuring you have access to cleaner, safer water in critical situations.
Key Takeaways
- Use clean, non-toxic materials like activated charcoal, fine sand, coarse sand, and gravel arranged in layered order for effective filtration.
- Start with a bottom cloth or coffee filter to prevent media escape and build upward with fine sand, activated charcoal, coarse sand, and gravel.
- Assemble layers tightly in a clean container to avoid leaks and channeling, ensuring all water passes through each filtration stage.
- Sanitize all components before use and test filtered water multiple times to verify clarity, odor removal, and contaminant reduction.
- Adjust filter layers based on test results and environmental conditions to optimize performance and maintain safe, purified water output.
Why Choose a DIY Water Filter Over Commercial Ones?

Why opt for a DIY water filter instead of a commercial model? You gain full control over design, tailoring filtration to specific contaminants in your water source. This lets you experiment with various topic ideas, optimizing performance for your needs.
Additionally, building your own filter often reduces costs and avoids reliance on proprietary parts prone to wear or obsolescence. However, safety considerations must guide your process; you need to ensure materials and assembly minimize risks of contamination or incomplete filtration.
Materials You Need to Build a DIY Water Filter
What materials do you need to build an effective DIY water filter? To ensure quick safety and optimal filtration, start by sourcing supplies that are reliable and non-toxic. Your materials should facilitate multi-stage filtering to remove sediments, contaminants, and odors efficiently.
Choose safe, reliable materials to create a multi-stage DIY water filter that removes sediments, contaminants, and odors.
Focus on these essential components:
- Activated charcoal: Crucial for adsorbing impurities and improving taste.
- Fine sand and gravel: These layers trap particles and provide mechanical filtration.
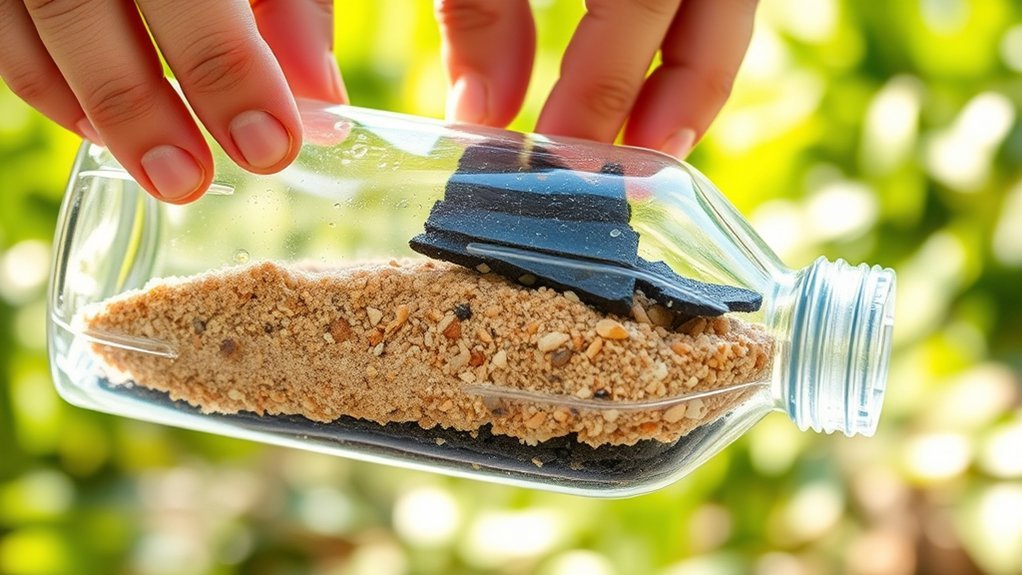
- A clean container (e.g., plastic bottle): Acts as the housing for your filter assembly.
How to Assemble a Basic DIY Water Filter Step-by-Step
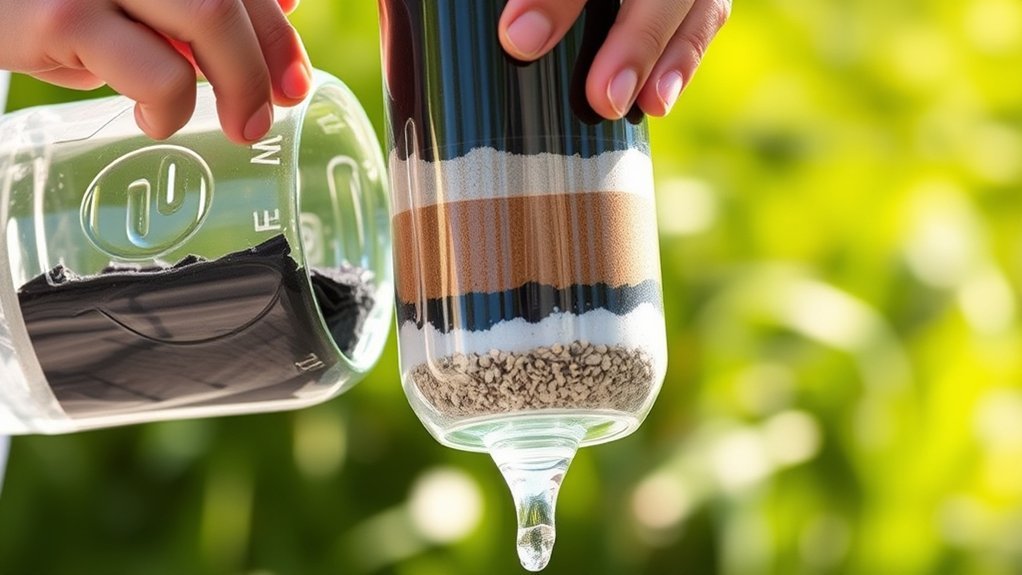
First, gather all the materials you prepared to ensure a smooth assembly process.
Next, carefully layer each filter component in the correct order to maximize filtration efficiency.
Finally, test the filtered water to confirm the system is working properly before use.
Gather Necessary Materials
A dependable DIY water filter requires specific materials to guarantee effective filtration. You’ll need to gather components that balance cost-efficiency and functionality, employing creative budgeting without compromising safety precautions. Selecting appropriate materials ensures the filter performs reliably under varied conditions.
Prioritize these essentials:
- Activated charcoal: Critical for adsorbing impurities and improving taste.
- Fine sand and gravel: Provide mechanical filtration by trapping sediment.
- A clean plastic bottle or container: Serves as the structural frame for layering materials.
Ensure all materials are clean and free from contaminants before assembly. Avoid using unverified or hazardous substances to maintain water safety. By sourcing these items thoughtfully, you’ll build a filter that’s both effective and economical, meeting filtration goals while respecting practical constraints.
Layer Filter Components
How exactly should you arrange the materials to maximize filtration efficiency? Start by placing a clean cloth or coffee filter at the bottom to prevent smaller particles from escaping, enhancing microbial prevention.
Next, add a layer of fine sand; this traps finer debris and supports layer stability by evenly distributing water flow. Above the sand, place activated charcoal, which adsorbs impurities and odors effectively.
Then add a coarser sand layer to filter larger particles and maintain structural integrity. Finally, top with gravel to prevent disturbance of lower layers during water pouring and to improve flow rate.
Ensuring each layer is evenly packed without gaps guarantees stable filtration and reduces microbial contamination risks. This precise sequence optimizes your DIY filter’s performance and longevity.
Test Water Filtration
Once the filter layers are properly arranged, you’re ready to assemble the DIY water filter for testing. Begin by securing the layered materials within your chosen container, ensuring no gaps allow unfiltered water to bypass the media.
To test filtration, pour a sample of contaminated water slowly into the filter’s top and collect the filtered output at the bottom.
Evaluate water quality by observing clarity and using simple testing kits to measure parameters like turbidity, pH, and contaminants. This process confirms the filter’s effectiveness and identifies any needed adjustments.
Key steps to test filtration:
- Conduct multiple filtration cycles to assess consistency
- Compare filtered water against baseline quality metrics
- Adjust filter layers if water quality standards aren’t met
This method ensures your DIY filter reliably improves water quality.
How Each Layer Cleans Your Water in a DIY Filter
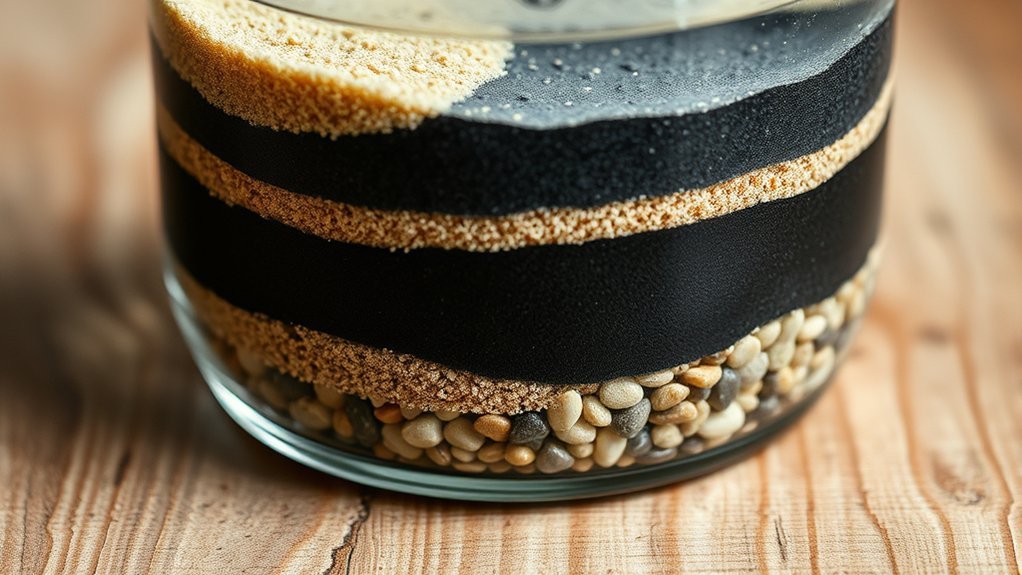
Why does each layer matter in your DIY water filter? Each layer targets specific contaminants, ensuring effective cup cleanup and adherence to safety standards. The top layer, usually coarse gravel, removes large debris like leaves and sediment.
Beneath that, finer sand traps smaller particles, clarifying the water further. Activated charcoal follows, adsorbing chemicals, odors, and impurities that sand can’t catch.
Finally, a layer of fine cloth or cotton filters out microscopic debris, improving water clarity and safety. By layering materials strategically, you optimize filtration efficiency and reduce contamination risks.
This precise setup mimics professional filtration, offering a reliable solution to purify water. Understanding each layer’s function helps you troubleshoot and maintain your DIY filter to meet essential safety standards consistently.
Tips to Test and Improve Your Homemade Water Filter
You’ll want to start by visually checking the water clarity after filtration to identify any remaining particulates. Next, test for common contaminants using simple kits to ensure your filter effectively reduces harmful substances.
Finally, adjust or add filter materials like activated charcoal or fine sand to improve purification based on your test results.
Checking Water Clarity
How can you determine if your homemade water filter is effectively improving water clarity? Begin by visually inspecting the filtered water against a well-lit background. Clear water indicates effective particulate removal.
Next, conduct crafting taste tests to assess any changes in flavor, which complements measuring taste impacts of filtration materials. To systematically evaluate clarity:
Use a turbidity tube or simple clear container to compare before-and-after samples. Record observations and quantify clarity improvements by noting sediment reduction.
Cross-reference clarity results with taste tests to ensure filtration doesn’t compromise water palatability. Maintaining consistent testing helps you refine your filter design for optimal clarity.
This precise approach ensures your homemade filter meets basic visual standards before progressing to chemical contaminant testing.
Testing For Contaminants
After confirming your filter improves water clarity, the next step involves testing for contaminants to guarantee safety beyond visual inspection. Begin by collecting water samples before and after filtration. Use commercially available test kits designed to detect bacteria, heavy metals, and chemical pollutants.
Conduct a risk assessment to identify potential contaminants based on your water source’s characteristics. Compare your results with local regulatory compliance standards to ensure your filter meets safety requirements. If contaminant levels exceed acceptable limits, adjust your filter design or materials accordingly.
Maintain detailed records of test results and modifications to track improvements over time. Consistent testing ensures your homemade filter not only clarifies water but also effectively reduces harmful substances, safeguarding your health and complying with established water quality guidelines.
Enhancing Filter Materials
Optimize your homemade water filter by carefully selecting and testing filter materials to enhance contaminant removal and durability. Use filtration media that mimic natural biological processes, such as activated charcoal combined with fine mesh layers inspired by fish anatomy, which efficiently trap particulate matter.
Test your filter under varying conditions, including solar heating, to simulate real environmental stresses and evaluate material resilience and performance.
Consider these tips to improve your filter materials:
- Incorporate layered filtration mimicking fish gill structures for optimized flow and filtration efficiency.
- Use solar heating cycles to test the thermal stability and microbial activity within filter media.
- Experiment with biochar additives to increase adsorption capacity and extend filter lifespan.
Avoid These Common DIY Water Filter Mistakes
Why do some DIY water filters fail to provide safe, clean water? Often, it’s because of overlooked design flaws or using inappropriate materials. To avoid DIY mishaps, always select filter media that effectively remove contaminants without introducing new hazards.
For example, avoid materials that degrade or leach toxins. Ensure a secure, leak-proof assembly to prevent unfiltered water bypass. You must follow strict safety precautions: sanitize all components before use and never rely on a single filtration stage.
Avoid using untreated sand or gravel that may harbor bacteria or chemicals. Regularly test the filtered water for clarity and odor; if either worsens, reassess your filter setup immediately. By adhering to these technical guidelines, you’ll enhance your water filter’s reliability and safety.
How to Build Advanced DIY Water Filters With Charcoal and Sand
Combining charcoal and sand in a layered filter substantially improves the removal of impurities from water. To build an advanced DIY water filter, start by preparing your materials: activated advanced charcoal, fine sand, and coarse sand.
Layer these carefully in a clean container to maximize filtration efficiency. The advanced charcoal adsorbs chemicals and toxins, while sand filtration removes particulate matter and pathogens.
Focus on these key steps:
- Use activated advanced charcoal for superior contaminant adsorption.
- Implement a graduated sand filtration system: coarse sand on top, fine sand beneath.
- Ensure tight layering to prevent channeling and maintain consistent flow.
Frequently Asked Questions
How Long Does a DIY Water Filter Last Before Needing Replacement?
Your DIY water filter typically lasts 1-2 months, depending on usage and water quality. Regular maintenance ensures durability, and you should establish a replacement schedule based on filter clogging and reduced flow for optimal performance.
Can a DIY Water Filter Remove Viruses From Water?
You can’t rely on a DIY water filter for virus removal due to virus removal limitations. To improve safety, combine filtration with disinfection methods and keep strict maintenance timing to ensure consistent filter performance.
Is It Safe to Use a DIY Water Filter for Drinking Water Daily?
It’s not safe for daily use without proper maintenance. Durability concerns arise quickly, so you’ll need frequent replacement of filter media to ensure effectiveness and prevent contamination risks over time.
How Do Temperature Changes Affect the Performance of a DIY Water Filter?
Temperature changes impact your DIY filter’s performance by affecting temperature stability and filter material compatibility. You’ll want to select materials that maintain integrity across temperatures to ensure consistent filtration. This helps avoid degradation or reduced effectiveness over time.
Can I Use Tap Water to Clean the Filter Layers?
Like hitting the reset button, you can use tap water to clean filter layers, but you’ll need to sterilize afterward.
Always perform water safety testing to ensure contaminants don’t compromise your filter’s effectiveness or your health.
Conclusion
Building your own water filter is like crafting a precise puzzle where each layer plays a pivotal role. By layering gravel, sand, charcoal, and cloth carefully, you’ll remove contaminants effectively.
Test your filter regularly, adjusting layers to enhance clarity and purity. With attention to detail and proper sanitization, your DIY filter can perform reliably.
Offering a cost-effective solution that matches commercial systems in function and efficiency, keep refining for the best results in your water filter.